
This post is the second installment in a series of posts on how to make the most of your content by repurposing. (See the first post, on repurposing podcasts into articles.) Be sure to subscribe so you don’t miss out!
We’re excited to share how to repurpose a blog post as video content with tips and tricks from Tillable’s VP of Marketing, Jessie Atchison.
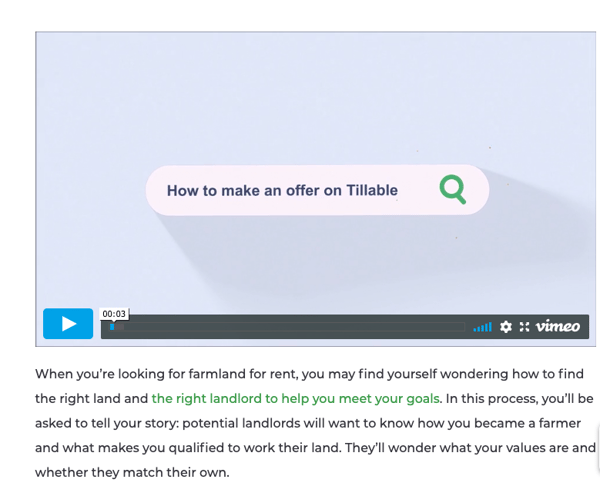 Tillable’s blog post, with video embedded
Tillable recently repurposed the blog post How to Make an Offer on Farmland into a video. The final product was produced in-house and created in less than a week.
We love the way the Tillable team transformed this piece of weekly blog content into an engaging how-to video.
Here’s how you can replicate the process in 10 steps (along with a few tools and tricks you can lift from their playbook).
First, let’s take a minute to understand the value of repurposing written content into video format.
Why Repurpose Blogs into Videos?
As Jessie points out, “People like to consume content in different ways. Some people would rather read an article, while others would rather view a video.”
So the simplest reason to repurpose your content is that it helps you reach a larger audience. But there are other reasons, too:
- Some content just lends itself to video. If you have frequently asked questions that you can address in an engaging, visually appealing way, video is a great option.
- Videos are social-friendly. Scrolling viewers get exposed to your content in a way they wouldn’t if they had to click on a blog link.
- Videos are easy to share. This makes them a powerful tool for customer support and sales teams looking to share informational and instructional content with customers and prospects.
Ready to repurpose your blog post into video? Read on.
1: Choose the Right Blog Post
Not every blog post makes a great video. Posts about company news and those that are opinion-heavy, for example, are probably best left as text.
Instructional content, on the other hand, works great for video. This is doubly true if search behavior shows that people are curious about how to do the thing you’re explaining. After all, more than half of YouTube users go to the platform to learn how to do new things.
Another great reason to turn to video is when content relies on charts, graphs, and other images. (And because you have your images already, the repurposing process goes much faster).
2: Write the Script
The simplest way to repurpose a blog post into a video is to use the text from the blog as the video’s voiceover.
This is exactly what Tillable did. “Instead of reinventing the wheel by writing a different script, just use the blog post that you have already written,” Jessie said.
To see if your blog post would make a good script, try reading it aloud. If it’s doesn’t sound great, look for places to make audio-friendly edits:
- Use shorter words instead of longer ones.
- Break long sentences into shorter, more easily digestible parts.
- Add narrative elements to break up highly technical sections.
- Look for opportunities to add an interview or Q&A with a subject matter expert.
If it still doesn’t feel like a compelling voiceover, the problem may be that you’ve picked the wrong blog post.
3: Record the Audio Voiceover or Live Interview
For DIY video content, the easiest place to find vocal talent is in house.
For the blog post Tillable recently repurposed, Jessie’s colleague Jordan Kull did the voiceover using a handheld Zoom H1 microphone that he found on Amazon for $90.
But even if you don’t have a team member who’s comfortable recording the audio, you have options. Voiceover talent on Fiverr, for example, is affordable and available for quick turnaround.
4: Edit the Sound
It doesn’t take an expert to edit the audio, but you will need an editing tool. The Tillable team recommends Audacity, which is a great option for beginners. Bonus: it's free for both Windows and Mac computers.
What will you do as you edit audio? The goal is to smooth out the voiceover. You can make soft parts louder and loud parts quieter, eliminate “ums” and “uhs,” shorten or lengthen pauses as needed, and more.
We recommend this tutorial for getting started with Audacity audio editing.
5: Edit Your Video and Visual Elements
If you haven’t made a video before, don’t worry about learning how to shoot b-roll. It’s actually easy to create video from a PowerPoint or Google Slides deck. To do it:
- Build a deck of visual and textual elements in the order you’d like them to appear in your video.
- If you’re using Google Slides, convert your deck to a PowerPoint file.
- Follow Microsoft’s instructions for turning your PowerPoint into a video.
There are many sites offering affordable stock video online, but Tillable’s team recommends two sources:
- Unsplash.com (Royalty free imagery under Creative Commons)
- Envato Elements (Monthly subscription, last listed at $20)
Of course, once you have these pieces together, you’ll need to dive in and do some video editing. To animate graphic elements and edit the video, the folks at Tillable suggests using:
- Adobe After Effects (Paid subscription). Editing tutorial here (starts at at 0:25).
- Movie Maker (Free for Windows users). Editing tutorial here (starts at 0:30).
- iMovie (Free for Mac users). Editing tutorial here (starts at 1:04).
Note: learning a new skill like this takes time! Don’t expect your first try to be perfect. You’ll learn as you go, and you can always redo work you’re not happy with.
6: Add Background Audio Enhancements
In addition to your voiceover, you may want to add background music or other audio elements. If you’ve subscribed to Envato Elements for stock video, mentioned above, you’ll have access to its audio library.
If not, Jordan suggests sourcing audio from the Youtube Music Library for free or from Audiojungle.net, where you’ll pay for each piece of music you buy.
7: Get Feedback
Although this is listed at step seven, it’s never too soon to get feedback. Depending on your team’s setup, it may make sense to get a second opinion once you have a draft of the script or as you’re selecting images to include in your slides.
Trust your instincts. Ask for a second opinion whenever you feel ready, and make sure you get a second set of eyes on your video before you post it online.
For a lean marketing team like Tillable’s, the editorial process was straightforward. Once Jordan had a first draft, he shared it with Jessie for feedback, then made edits. When the edits were done, their team was ready to add the finishing touches.
8: Add Closed Captions
Before you upload your repurposed video, add closed captions. This is important because closed captions make your video accessible to the deaf and hard of hearing. They also help folks who watch videos without the sound on (which we certainly hope they’re doing if they’re watching in public without headphones!).
It’s tough to find this service for free, but Rev.com offers an affordable option: closed captions in under 24 hours, for $1 per minute of video.
9: Choose the Right Video Host
The “right” host for you will depend on your goals.
If you’re looking for a free option, YouTube is the place to go. YouTube is highly functional, but it may not provide the clean interface you’re looking for. For example, when you embed YouTube videos in a blog, the default mode is autoplay: when your video finishes, other random videos start.
As an alternative, Jessie suggests Vimeo, which does offer a lean free membership option. You can also pay a modest amount for access to video hosting without pop-ups or a sidebar of suggested autoplay videos.
10: Upload Your Video
Once you have sign-off from your marketing team, the repurposed video is ready to go online!
Putting creative projects into the world always feels like taking a small leap, but don’t overthink this last step.
Need more reassurance? In producing the latest Tillable video, rather than giving the team a directive to “Make it perfect,” Jessie focused on getting the right content out the door. As she said, “Content that never reaches the audience doesn’t do anyone much good.”
It can be tempting to hold onto these projects to make one more round of tweaks, but we recommend publishing your best content, tracking its performance, and using what you learn to guide your next repurposing project.
Don’t Forget to (Strategically) Share Your Video Content
Once your video is live, it’s time to promote the new content. The bulk of that promotion will likely happen on your company’s social media channels.
Be sure to consider all your options in relation to the final product. Is it more appropriate to share this video on Facebook than with your professional network on LinkedIn? Would it make a good LinkedIn ad?
To get the ball rolling, don’t forget to share your video with your internal team, as well.
In addition to posting it on their own social media pages, your colleagues may find it useful in their day-to-day work: customer support may use it to help customers troubleshoot a problem. Sales reps may use it for lead gen. The CFO may send it to their mom. Who knows!
Once it’s out in the world, check in with your social media manager to make sure your video is getting enough exposure. And don’t forget to add it to the top of the original blog post.
If you’re curious about how repurposing content can help you grow your audience and boost conversions, stay tuned to the Propllr blog. We’ll be publishing several more installments in this series in the coming weeks!


